Showing posts with label windows. Show all posts

Sunday, June 15, 2014

Weeks 20 & 21 - We now have windows

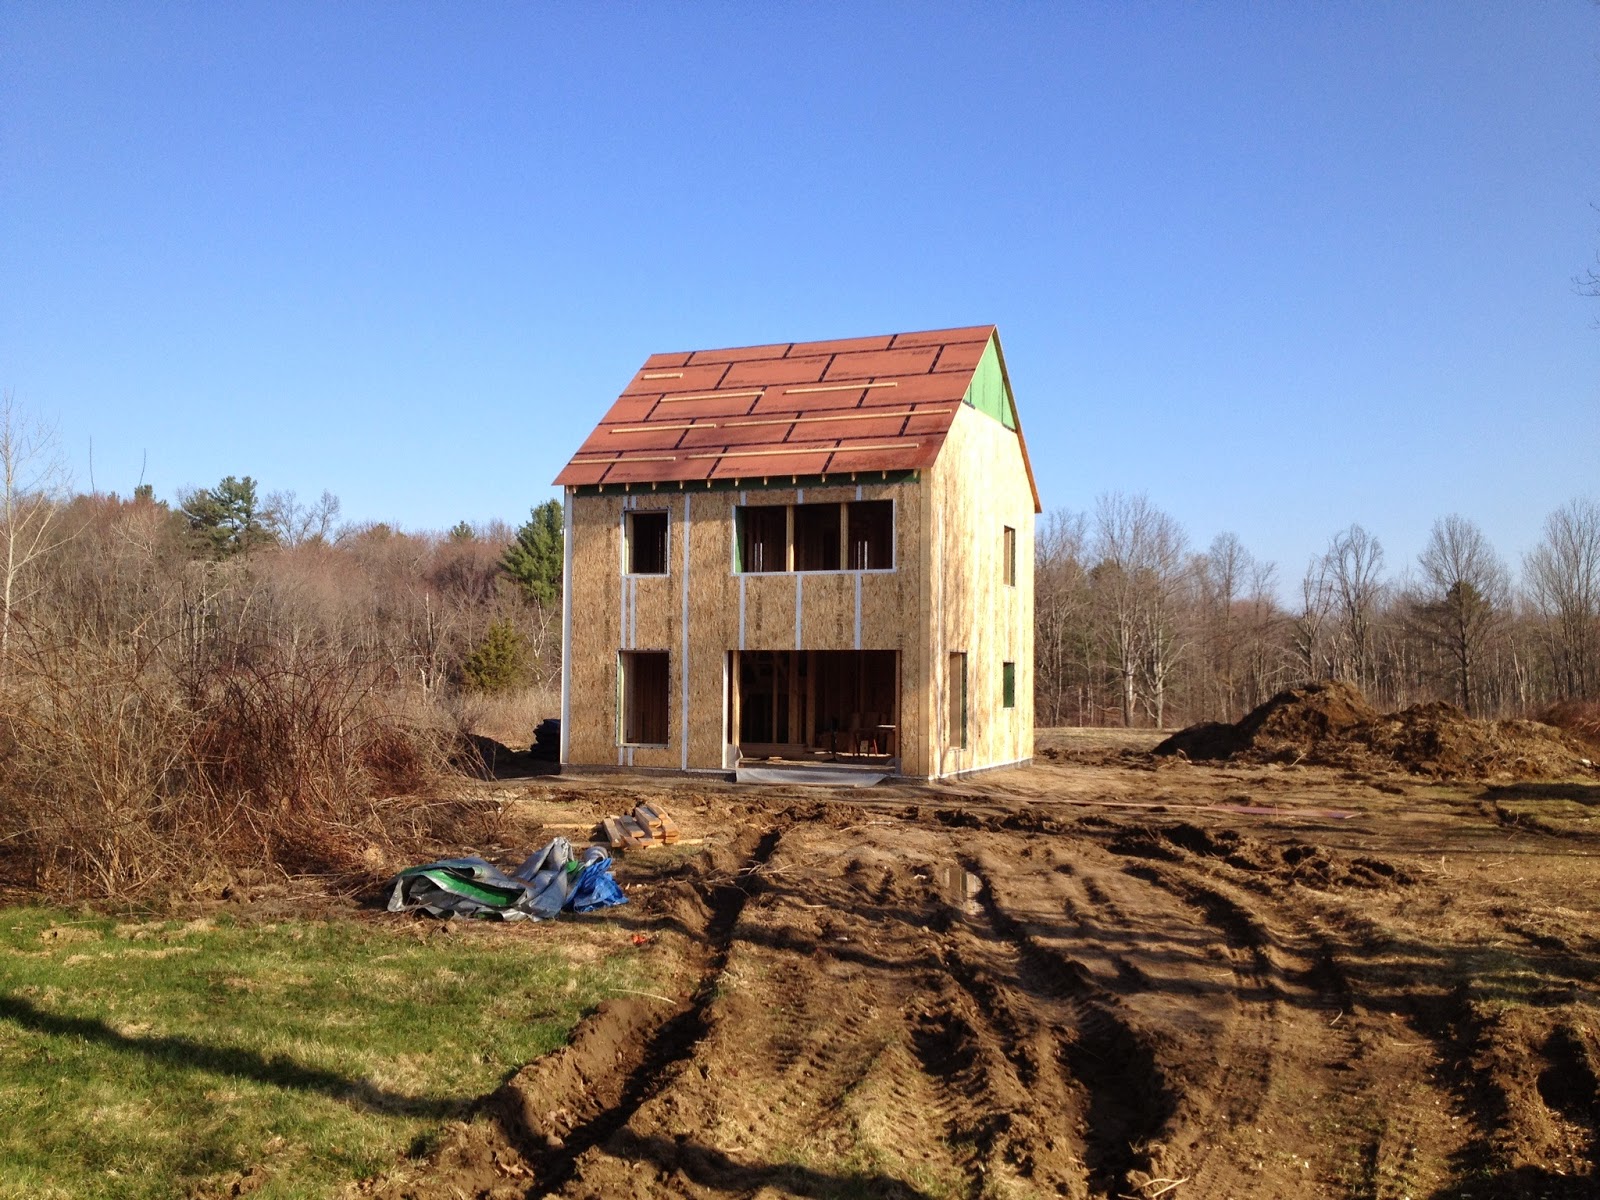
I was out of town for weeks 20 and 21, so I missed out on the whole window installation process, which was a major bummer. Kathy stopped by after week 20 and sent me some pictures of the windows, which helped prevent me from being eaten alive with curiosity.

Kneer-Suedfenster is a German window company that’s been around since 1932. Their windows are custom sized, passive house certified, triple pane, high quality and — surprisingly — cheaper than Marvin double pane windows.

Since Integrity hadn’t installed Kneer-Suedfenster windows in the past, GO Logic sent down one of their carpenters from Maine to give a demo installation and to inspect the windows after their long trip from Germany. The guys reported that the installation was easy. Most of the windows were in place after three days of work.

First impression: oh wow, the frames are huge

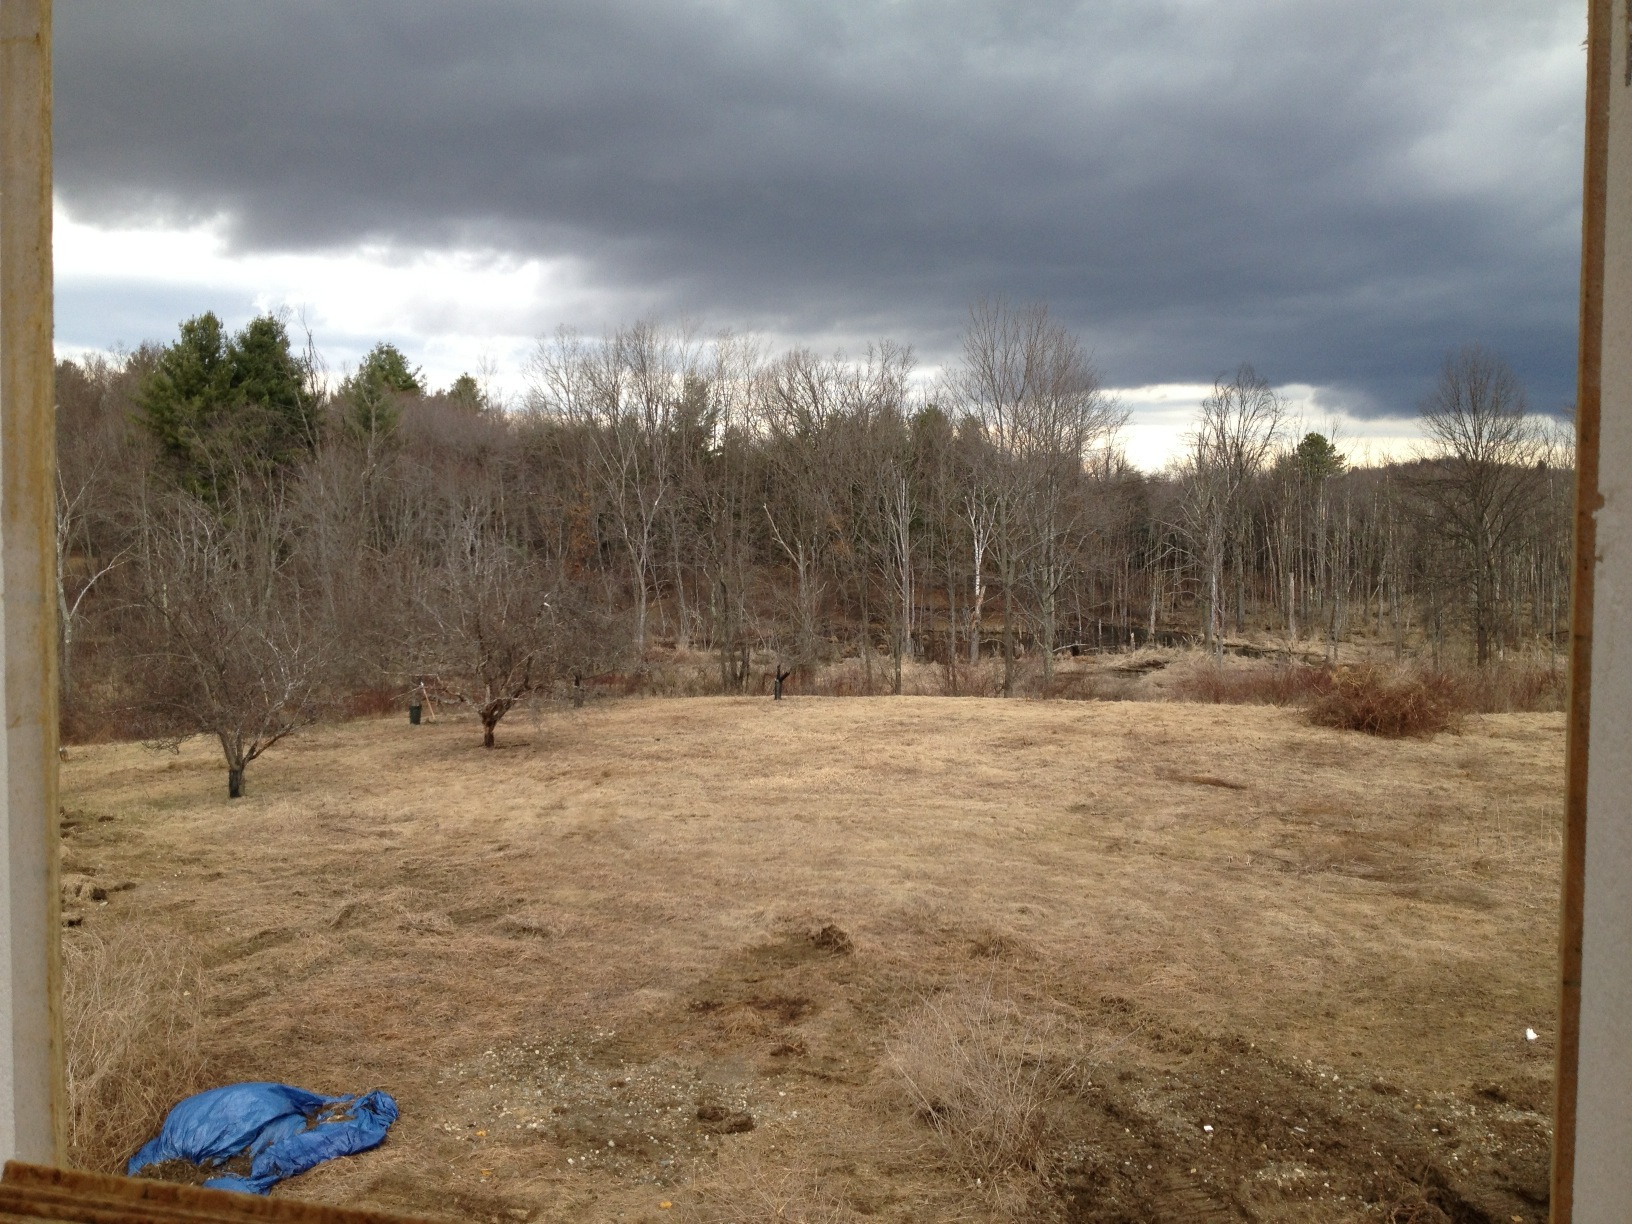
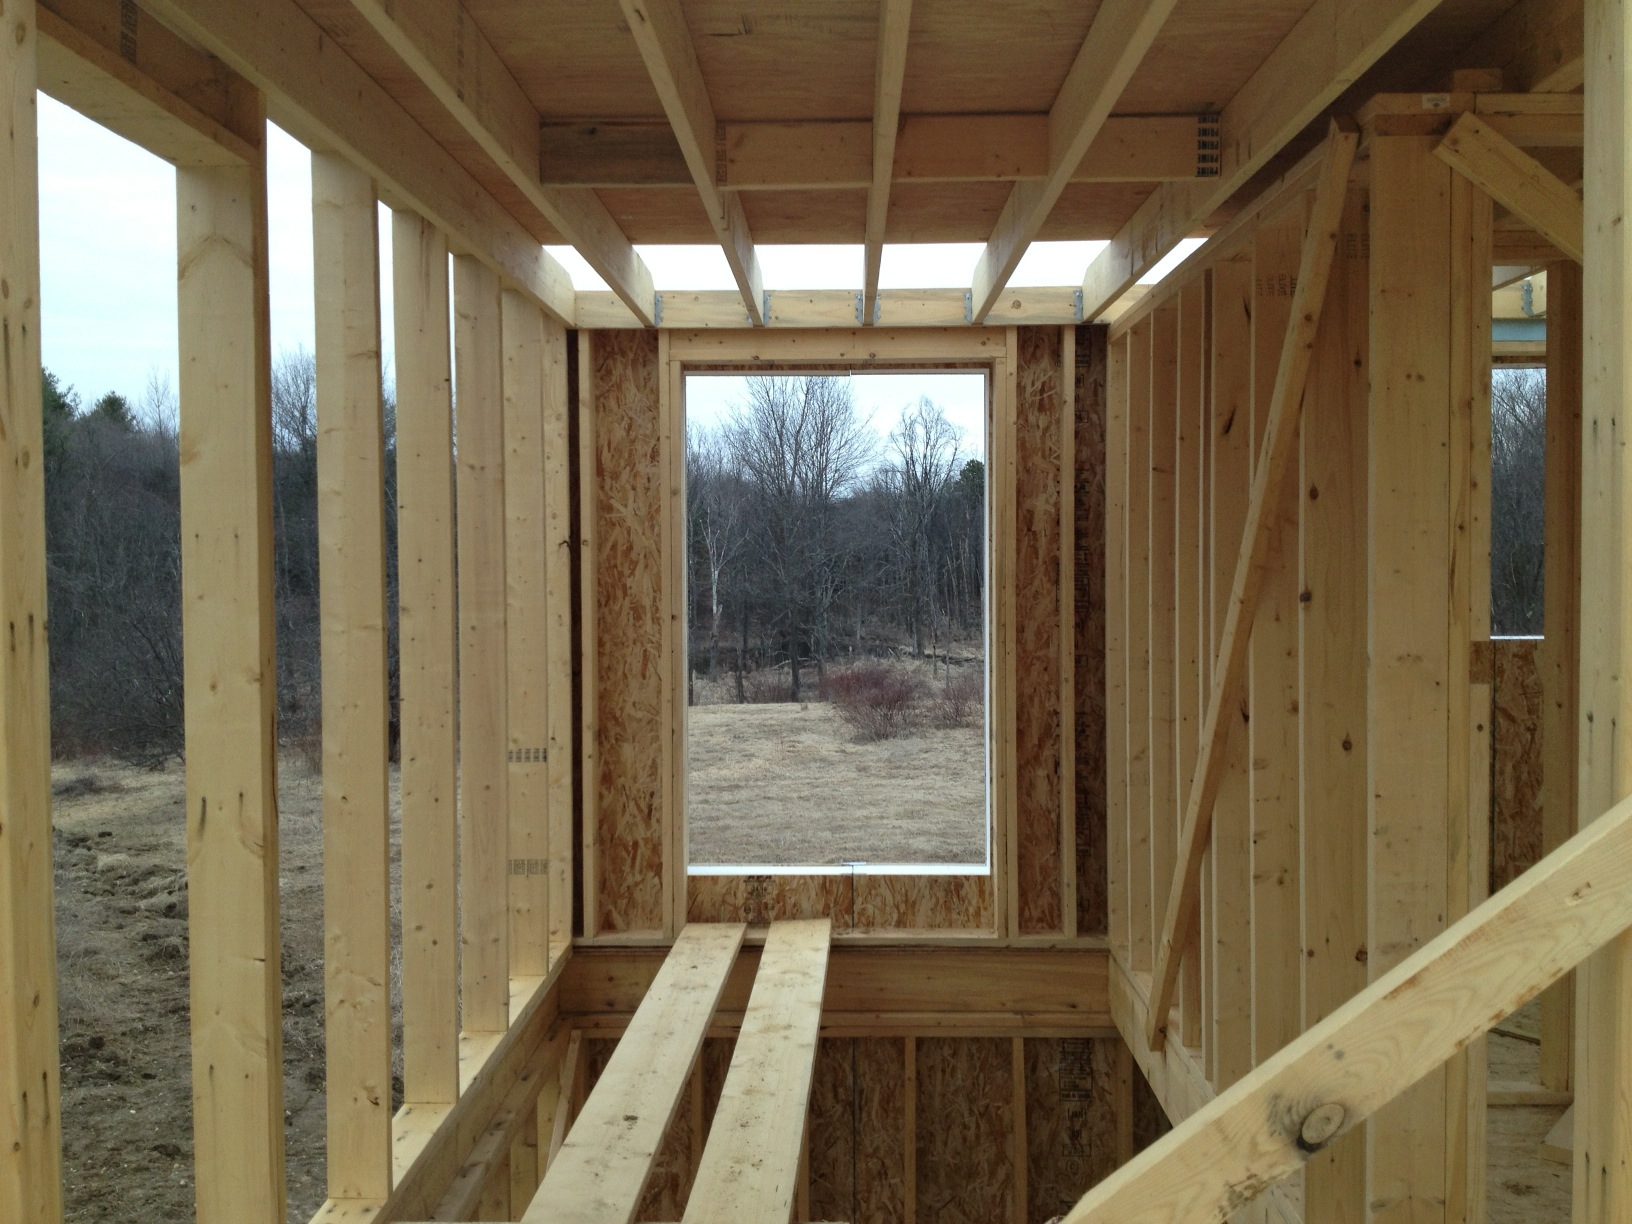
Oh no! Check out how much the actual window area has shrunk! Back when the SIPs were installed, the window openings were already squeezing me in. Now I feel like I’m on an airplane looking through a port hole. I guess it’s the price we pay for energy efficiency — windows lose a lot of heat, and even the south facing windows upstairs have to be kept small to avoid over-heating on sunny winter days. The small size of the windows upstairs is probably the biggest — or maybe the only — serious sacrifice that the Passivhaus standard has brought, but it’s still hard to swallow.

The master bedroom widows, however, work well at this size. The three widows let in a good amount of light and allow a nice view of the hillside, but still give you a bit of privacy.

Kneer-Suedfenster windows are pretty awesome

Once you walk up to these windows, you notice how exquisite they are. The handles make you feel like you’re getting into a Mercedes. The feel is solid. The look is simple and elegant. The clicking and latching sound of the locking mechanism is reminiscent of a car door unlocking. There’s even a whooshing sound as the seal is broken as the window opens.

The thickness and heftiness of the window is ridiculous. It feels more like you are opening the door to a vault at the bank than a window. The triple paned glass must be almost two inches thick!

There are three levels of rubber seals to ensure that the window is air-tight, in addition to a bomb-proof locking mechanism that locks at multiple points all around the perimeter.

Tilt and turn is fabulous

Most windows in the US either slide up or sideways, or have that little ridiculous crank handle at the bottom that is impossible to use. Tilt and turn windows, popular in Europe, open inward like a door (shown above). It’s easy, convenient and satisfying — you get a full wide open window that brings in a ton of fresh air. You can pop your whole body out the windows for a good look around. You can clean the outside of the glass and install the bug screen from the inside.

For just a little bit of fresh air, turning the handle upward allows you to open the window from the top down — the tilt position. This is great for when you don’t want to deal with a wide open window or it’s raining outside.

Not so happy about the dining room windows

At the last minute, GO Logic panicked about meeting the passivhaus heating goal of 15 kWh/m2 per year. They decided to widen the set of three large downstairs windows which let in a large chunk of the solar heat. It made sense to increase their size, but the dining room area now feels much more wide open than I originally imagined. The inside feels too exposed to the street and the window layout feels somehow out of balance. From the outside, the vertical symmetry between the upstairs windows and the downstairs windows is awkwardly upset.

I might just need to calibrate myself to the new look, but I can’t help but feel that this scenario illustrates something broken with the passivhaus design process. The last minute redesign probably resulted in a tiny reduction of the actual heat load — just enough to bring us under the 15 kWh/m2 target — but it forced a number of errors and difficult compromises to an otherwise well planned project. I don’t have an easy prescription for avoiding this situation in the future, but there must be a better way.

Important things to know about windows

There are three important terms.

U-Value is the thermal conductivity of the window, often given in units of [Btu/hr SF ℉]. Lower U-Value is better for keeping heat in the home. Take the inverse of the U-Value to get the R-Value, which is typically used to describe the thermal resistance of walls. Air has a much lower thermal conductivity than glass, so trapping a pocket of air between two glass panes dramatically reduces the thermal conductivity of the window. A U-Value of 0.5 is horrible. A U-Value of 0.1 is fantastic.

Visible Transmittance (VT) is the percent of visible light that passes through the window. A higher VT is generally better, unless you want to avoid direct sunlight or glare. Lower VT windows will look tinted.

Solar Heat Gain Coefficient (SHGC) is similar to VT, but for the whole solar spectrum. One amazing fact about the solar spectrum is that heat itself is radiated in an identical way to light — as photons. Radiant heat is light, we just can’t see it with our eyes. In fact, most of the energy in the solar spectrum is in the form of invisible heat photons. SHGC describes the fraction of the total solar spectrum (heat plus visible light, plus other stuff) that penetrates through the window. Consider two similar windows that both look completely transparent to the eye. One might allow a lot of heat photons to pass through — giving a high SHGC. The other might fewer heat photons to pass through — giving a low SHGC. High SHGC around 0.7 is great for south facing windows because they let in a lot of heat. Low SHGC around 0.2 is great for north facing windows because they won’t let as much heat escape from the inside.

Wednesday, April 23, 2014

Week 15 - Roof is up, working on window framing

The week involved finishing the roof sheathing, working on the window frames and building a temporary staircase. Things are starting to get detailed, and are taking more time. Below, I’ll show how the windows are framed since the process appears to be non-standard (and important).

Roof almost done before the snow

Don almost had the roof complete before the wind picked up and nearly blew him off (according to how he tells it). The next day, the rain and snow ended up getting everywhere. Above, a little bit of snow is still left on the roof after the storm. I love this shot of the back of the house from the apple orchard. As architect Todd said: “the house sits nicely on the land.”

A look at the scissor roof trusses

Here’s a cool shot of the scissor trusses. ZIP panels will be attached to the underside, forming the air barrier as well as the gabled ceiling of the two front rooms. Almost 2 feet of blown-in cellulose insulation will go on top of the ZIP panels, outside the airtight envelope. There is some reduction in the insulating ability of the cellulose due to the fact that cold air will be able to move through the insulation, but the advantage is that moisture will not get trapped.

The roof truss at the eave sits on the ZIP air barrier. The ZIP will continue along the scissor truss. Notice how the floor joists are angled to accommodate the ZIP and drywall.

It takes time to frame these windows

Normally, the window framing would be complete at this point (except the sill is missing in the image above). With our construction, the window frame spans two walls: the SIP wall and the stud wall, so there’s quite a bit more to do. The two walls must be bridged in a way that is airtight and moisture repellent. Don and a helper spent much of the week finishing the extra steps to frame the windows, and reported that the process was somewhat elaborate and time consuming.

First, if you look closely at the SIP part of the frame, you’ll see a gap between exterior OSB panel and the foam insulation. That gap is meant to allow 2 x 2 wood pieces to be wedged there, to provide somewhere to nail the rest of the framing to the SIP.

Next, the green ZIP sheathing is nailed to the frame, bridging the two walls. Caulking is applied under the ZIP to prevent water and air from migrating horizontally.

2 x 10 boards are nailed to the ZIP to provide a solid wood frame, to which the window can be attached. Again, caulking is applied under the boards.

The entire window frame has the appearance of being over-engineered — it’s three boards thick in some places. I wonder if this bomb-proof structure is by design — to reduce load stresses and sheer stress from the windows — or if it’s just a function of having to deal with the SIP wall and stud wall discontinuity. As you might imagine, measuring all these boards, caulking and nailing takes a substantial amount of time.

But we’re not finished. Outside (1st floor window pictured here), the SIP is affixed to the interior window frame with gigantically long screws, and then tape is applied where the ZIP meets the SIP. As far as I can tell, this location — the outside of the SIP — is the primary air barrier. The window will sit right on the edge of the innermost 2 x 10 boards.

Sunday, April 13, 2014

Week 14 - Starting to look like a house

The walls are in place and the roof trusses are up. Don and crew are now working on the roof ZIP sheathing. It’s starting the come together and look like a house! The weather has been amazing, and that might be a big reason why so much got done this week.

Using the lull to raise the SIP walls

The ground dried up enough so that Don could maneuver the lull through the mud, allowing him to raise the SIPs on the east and west sides. These panels are considerable bigger than those on the north and south sides. It would have been difficult to lift them by hand, so we really lucked out.

The movie shows the lull lifting the SIP, with a rope used to stabilize the SIP. Notice how the SIP starts to slip off the fork, and then the guys on the roof were able to pull it back into place, but not before having to walk out on the headers like acrobats. They are fearless. Keep in mind that there’s no floor under them – they are balancing on the header beams, and on one side there’s a two story drop!

Once the lull got the SIP most of the way up, the guys on the roof were able to pull it upright against the house.

To help lift the panel onto the foundation ledge by hand, a little plastic handle came in handy.

Sliding these large panels over was difficult, so the lull was used to push them in place. For some reason, the panels on this side came out bowed and it was tough to get them to interlock. Using the lull to push on the panel, the guys banged furiously on the seam, gradually jostling the two panels together.

Update on the views from the windows out back

It’s interesting. Now that the walls are up, I’m more happy with the views out back. The walls do indeed obscure parts of the view that were wonderful, but now that you can’t see those parts, you don’t know they are missing. Instead, all you see is a subset of the view, but it looks charming regardless.

If you walk up to the rear bedroom window, you can get a pretty wide angle view, just not the whole wrap around view. Still, it would have been nice to have more windows on this side of the house, but I’m happy with how it turned out. Neighbor Jesse (an architect, coincidentally) says that sometimes it’s good to have to work for the view.

Details at the window frame and roof eave

ZIP sheathing at the window opening provides a moisture resistive barrier and air barrier all in one panel. The edge of the sheathing is taped around the corner of the rough opening.

At the roof eave, the ZIP sheathing is placed face down. The tape runs along the underside of the sheathing and is dangling out, eventually to be taped to more ZIP sheathing that will run under the roof truss. Lots of caulking went under the ZIP sheathing – between the SIP and the ZIP – presumably to allow the SIP to expand without lifting apart the critical ZIP barrier. More tape will go on the other corner of the ZIP where it meets the outer side of the SIP.

Roof trusses arrived

The roof trusses were manufactured off site and delivered on Tuesday. The lull came in handy for getting these up on the roof.

The rest of the week was spent working on the roof, even with two extra guys for some of the time. It seemed like a lot of work went into getting this part of the roof together.

Saturday, April 5, 2014

Week 13 - Getting the SIP walls up!

It was an exciting week. Don finished the second floor framing and spent Thursday and Friday putting up the SIPs along the north and south walls, with the help of two younger guys. They were an awesome team to watch, constantly bantering, moving here and there, helping each other out, and communicating about tactics, problems and next steps. It’s great to see an experienced team — a fine tuned machine — working like that. They are, however, pretty cavalier about running up and down the ladders — the most jiggly and unstable ladders I’ve ever seen — which was scary to watch, but entertaining.

Forklift instead of a crane, didn’t work out

Instead of a crane, Integrity decided to use a large forklift to lift the SIPs. A crane is more expensive than a forklift and it seemed like it would do the job just as well. Turns out that we didn’t even need the forklift. It got stuck in the mud around the perimeter of the home, and wast therefore totally useless. It’s not clear from the image above, but those tracks are at least two feet deep.

Raising the SIPs

Instead, we carried over the SIPs by hand and raised them by walking it up from one end, as the video above shows. It’s pretty heavy, but doable.

The whole SIP installation process

First, narrow strips of OSB are measured and cut, inserted into the grove at the SIP’s edge, and nailed into place. These inserts help lock the SIPs together.

The plastic vapor barrier is wrapped from under the concrete, over the EPS foam, back over a piece of plywood directly on top of the foam, and then up along the frame. A double strip of caulking is applied to the plastic at the ledge where the SIP will sit.

Once the SIP is standing vertically, it must be lifted up onto the ledge, which is awkward, but the guys were able to do it — they seem to have fingers of glue. Then the SIP is slid over against its neighbor. It is surprisingly easy to slide the SIP along the ledge, apparently due to the smoothness of the plastic and an ample amount of caulking. Banging along bottom of the SIP gets the bottom end flush with the adjacent panel (to within an eight to a quarter of an inch), where it is fixed with a nail before the top is wedged into place, bringing the whole panel flush with its neighbor.

The image above shows Don nailing the panel to the insert.

A 2 x 8 board is laid in the grove at the top of the SIP and nailed into place.

Gigantic screws fasten the SIP to the frame.

By the end of Thursday, almost the whole north wall was complete.

Because of the extra spacing between each panel, about 1/2“ to 3/4” had to be cut off of the end of the panel to make it flush with the frame.

Finally getting to see how the window openings look

I’ve been looking forward to seeing how the top of the stairway would turn out for about a year now. Looking out at the window over the stairs settles it: let’s remove the shelving at the top of the stairs — the view would be interrupted too severely. The question remains: how will we make up for the lost storage space?

Looking in the other direction, the study window feels a bit small, but the mountain is nicely framed.

Adding the third window in the middle really makes this view from the master bedroom work. I’m so glad we decided to go with it.

Sunday, March 23, 2014

Floor Plans 2


In a previous post, we talked about how the design of the first floor layout helps make the home feel bigger than it really is. The upstairs is a different story — we need to fit three bedrooms, a bathroom, and a washer/dryer into a small space. There’s no way to open everything up: it’s going to feel tight no matter what. The question is whether we can arrange everything to use space efficiently while keeping the floor plan as open as possible.

Much like the first floor layout, GO Logic provided fantastic off-the-shelf floor plans, and I couldn’t help but to shift a couple of things around.

Double doors at the top of the stairs and a window


I love the feeling of walking into a well-designed home for the first time. Your viewpoint is obstructed by something — maybe stairs or walls — then, bam!, you see straight ahead onto an interesting space, wide open and well-lit. It’s a great feeling: emerging from a tight space to observe a striking view.


I wanted to go for a similar feeling with the stairway, in a much more modest way. The image above gives the perspective as you walk up the staircase and look straight ahead toward the study. We added double doors to the study entrance so that the top of the staircase would feel expansive, and so that you get an unobstructed view out the window in the background. The small landing at the top of the stairs gets to function as an extension of the study rather than a closed off space.

A lovely view north, but no north-facing windows?


The view north overlooks an apple orchard, marshland, great blue herons, egrets, hawks, beavers and more — it’s awesome. The property is a rare treasure for its proximity to wetland, conservation land and hiking trails. But north-facing windows are heat losers, with no solar gain, and should be minimized in passive houses. Should I sacrifice the passive house design principles in order take full advantage of the surrounding views of wildlife and conservation land?

Looking out over the property, the architect, Matt O’Malia, turned to me and said: “You know, we don’t have to build a passive house. We can face north. It will be a house that performs well, but doesn’t meet passive house standards.” I thought about it for a bit. In the end, I couldn’t give up two things: the bragging rights of a passive house and the wonderful feeling of having abundant sunlight streaming into a room.

Some north-facing windows are OK


As a compromise, we increased the size of the north facing window over the stairs and added a west-facing window at the landing, but kept our adherence to the passive house standard. Our Kneer-Südfenster windows are so good that these changes didn’t incurring much of a heat demand penalty anyway.

The image above shows the stairway landing, as seen from the study. The west-facing window (on the left) will be a great spot for wildlife viewing and watching the sunset while also serving to illuminate the hallway. The north-facing window over the stairs is sufficiently large to provide a nice view from the landing.

More storage or more views?


The built-in shelving is one aspect that I’m still on the fence about. On the one hand, storage space is limited and I’d like to use the space at the top of the stairs effectively. On the other hand, the shelving is blocking the view to the north window from the landing and the study, and might be closing off the top of the stairs awkwardly. The compromise that the builder and I came up with is to wait until the second floor and the walls are up, then have a look around and see if we can come to a decision.


Here’s a look at the same perspective as above, but with the shelving removed, leaving a direct line of sight to the rear window. What do you think? Why sacrifice the heat loss through a large northern window and yet not take full advantage of the view out that window?

Small washer/dryers save a lot of space


Go to Best Buy or Home Depot and look at the washer-dryers; they’re enormous! How am I going to find a place for these behemoths? Luckily, the Europeans came to the rescue, once again.


These are the Miele washer/dryers. They’re compact, efficient, yet accommodate a surprising volume of laundry, and they look neat. They can fit right into a hallway without taking up too much space. The downside is that they are unbelievably expensive. I ultimately decided it was worth it.


The image above is looking down the hallway back toward the landing and the west-facing window. Notice how the washer/dryer stack is flush with the wall — no doors or a separate laundry room to needlessly take up space. The bathroom is off to the right. Both the washer and the shower are fed hot water from a single on-demand water heat located in the utility closet on the first floor, right beneath the hallway. The close proximity of the water heater, the washer and the shower helps reduce the length of the hot water pipes, giving instant hot water and reducing wasted heat.

I also love the fact that the west facing window at the end of the hallway will let afternoon light percolate deep into the hallway. It’ll be a great spot to watch the sunset. In the summer, however, there will be a cooling load penalty: the afternoon sunlight will warm up the home somewhat. I think the window adds so much to the hallway, however, that I’m willing to use a little more energy in the summer to cool the home.

Extra windows for the master bedroom versus overheating?


The architect had originally planned for two windows in the master bedroom, having determined the right amount of south facing window area needed to heat the upstairs while avoiding overheating. But I argued that overheating in the bedroom was less of a concern for me than to have a wide open view, a more open bedroom and more of a connection to the outdoors. A midday nap in a warm bedroom on a sunny day doesn’t sound that bad to me, anyway. I don’t tend to use the bedroom during the day, though, so I think we’ll be OK even if overheating is an issue.

An open feeling in a small bedroom


A couple of neat tricks help make the bedrooms more feel spacious even through they are tiny (the master bedroom is only 136 sq ft while the typical American master bedroom is 256 sq ft). First, vaulted ceilings provide extra space overhead and also look cool. Second, the closet doors were removed in favor of an open closet with a closet system. Third, the position of the door to the third bedroom across the hall allows you to peer across the full width of the home when sitting in the reading chair, the viewpoint from which the above image was drawn.

The walls on the second floor are going up this week, so it won’t be long until we get to see how it all comes together!

Sunday, January 5, 2014

Hello neighbors postcards!

image-128

Some of my new neighbors might be curious about the activity on their street, so I made up this postcard that Ill drop in their mailboxes. I thought it would be nice to let them know whats going on, but really Im interested in getting started on my ambitious plan of world domination — by convincing everyone to live in ultra-efficient tiny houses!

Here are some of the most striking energy efficiency features of the Potwine Passive House, as listed in the postcard. Ill talk more in depth about these in future posts.

What is a passive house?

Originally popularized in the seventies by back-to-the-earth types, the passive house concept didn’t hit the mainstream until the early nineties when Professors Fiest (Lund University, Sweden) and Adamson (Institute for Housing and the Environment, Germany) took up the concept in earnest using a strictly scientific approach. The central thesis is that the greenhouse effect can be exploited in buildings to provide most of their heating needs. So much heat is available from the sun, in fact, that the original idea involved generating all of a building’s heat from the sun — hence the name passive: no active or mechanical processes would be required. A building would simply take care of its own temperature inherently, reminiscent of the clever designs of ancient buildings that functioned astonishingly well without a modern furnace or air conditioning. Today’s passive homes use many active mechanical systems like air conditioning and air ventilators, but the majority of heating comes passively, from the sun.

South facing windows are the critical source of heat

img-alternative-text

South facing windows can capture a tremendous amount of the suns energy in the winter while the sun is at a low angle in the sky. In the summer, when the sun is at a high angle in the sky, an overhang blocks light from hitting the windows to prevent excess heating. Windows facing west, east and north are kept to a minimum, if possible — they will lose heat while adding little solar heat gain. The challenge is to keep the south facing part of the building livable: too many windows will generate too much heat during the day and lose too much heat at night. We want just the right amount of south facing windows to generate enough heat, but no more.

R6 insulated triple pane windows make a huge difference

img-alternative-text

Windows are terrible insulators; they incur the greatest heat loss in most buildings. Increasing the insulating capability of the windows will result in enormous energy savings.

The actual amount of heat loss expected from a given type of window is quantified by a metric called the U-value, a measure of how much heat is lost per temperature difference between the inside and outside. A good double pane vinyl window will have a U-value of 0.37, given in the (stupid) US units of [Btu/hr SF ℉]. We’ve elected to go with German Kneer-Südfenster triple pane UPVC windows with an amazingly low U-value of 0.167, lower by more than half the U-value of a typical double pane window! This means that our triple pane windows will be retaining more than twice as much heat compared to double pane windows, and this will make a huge difference in energy savings.

The U-value is the inverse of the R-value, the common metric for insulation. Converting the U-value to the R-value of our windows gives an R-value of R6.

Concrete thermal mass foundation stores heat for the night

img-alternative-text

What happens at night when the sun goes down and it is cold outside? We want to be able to store the heat gained during the day and use it at night. That is, amazingly, exactly what the concrete slab foundation will do! The foundation of the home consists of a concrete slab sitting on top of a layer of insulating foam. The concrete serves as a huge reservoir for heat, helping to keep the temperature constant inside the home by absorbing heat during the day when the sun is out, and by releasing heat at night when the temperature inside cools down. The slab is insulated from the ground to prevent stored heat from escaping through the earth. The trick is to figure out how much concrete is needed to absorb a sufficient amount of energy during the day to keep the home warm at night. Too much concrete will never allow the home to get warm. Too little concrete will never be able to keep the home warm all night. The architect uses an energy model to decide how thick to make the concrete slab.

R50 insulated prefabricated wall panels

img-alternative-text

The walls are put together in a new and interesting way that helps lower cost, save time and reduce air leaks. Huge wall panels are prefabricated ahead of time in a factory setting, shipped to the building site and then hung on the frame. The installation process only takes a couple of days. The huge size of the panels minimizes the little cracks and seams that cause air leakage in traditional walls. The panels are called Structurally Insulated Panels (SIPs). The SIPs are 8" thick. A normal 2"x6" wall is added to the interior of the SIPs and filled with blown-in fiberglass, resulting in a super insulated wall assembly with an astronomical R-value of R50.

Heat recovery ventilation keeps the air fresh

A typical home leaks a lot of air to the outside. It’s equivalent to leaving the front door completely wide open! In many cases, the leaks are there by design: they bring in fresh air. But when a home is tightly sealed, things will get stinky pretty quickly unless you have a way of ventilating the place. The problem is that you can’t just open a window because you’ll lose heat (or cold) and defeat the whole purpose of tightly sealing the home. The solution is absolutely ingenious: a Heat Recovery Ventilator (HRV). The HRV brings fresh air into the home and simultaneously exhausts stale air to the outside, yet miraculously doesn’t allow heat to escape. I’ll explain how this works in a future post; it’s very clever.

Drain water heat recovery saves hot water

Hot water is a tough issue to solve. Heating up water requires a tremendous amount of energy. Many choose to employ natural gas water heaters, which are probably the most economical option (at least until the natural gas bubble bursts). Our goal is to go fossil fuel free, so we had to consider other options. In a future post, I’ll talk about why we ended up choosing on-demand tankless water heaters instead of solar thermal hot water or a heat pump water heater.

img-alternative-text

For the moment, however, let me tell you about one of the really cool aspects of our hot water system. Think about what happens when you take a shower. Hot water pours over your body and disappears down the drain. All that energy goes into heating the hot water, but most of the energy is immediately waisted down the drain. Enter the Drain Water Heat Recovery (DWHR) pipe: a drain pipe that recovers most of the heat in the water flowing down the drain and magically transfers it back to the inlet of the water heater. The operating principle is similar to that of the HRV.

LED lighting saves electricity

img-alternative-text

LED lighting represents a dramatic improvement in lighting technology, providing higher efficiency than incandescents, better color than fluorescents, dimmability and cost savings over the ridiculously long 40 year life of the bulb. Like most energy efficient options, the upfront costs are high, but you save money in the long run. We are outfitting the house with PAR30 (short neck) LED track lights. These bulbs are larger than your standard GU10 or MR16 halogen replacement track light bulbs, but they provide more light, are cheaper and are more efficient. A 12 Watt PAR30 LED replaces a 75 Watt halogen bulb, saving an amazing 84%!

Other cool features

Check back here to find out more about the other fascinating energy saving features of the Potwine Passive House, including:

  • An efficient box-shape building structure that retains heat extraordinarily well
  • A bunch of clever space saving architectural elements that make a small home appear more spacious
  • A 4kW solar photovoltaic (PV) array that will provide 100% of energy
  • Tankless on-demand water heaters from Stiebel Eltron, providing instantaneous hot water that never runs out, all in a tiny package at a low cost
  • An efficient Fujitsu heat pump, providing heating or cooling in one unit, at an efficiency more than two times that of a conventional heating system
  • An efficient heat pump dryer, more than twice as efficient as a conventional dryer
  • An efficient induction stovetop that boils water faster (while using less energy) than any other stovetop
  • An efficient steam oven that will cook a whole chicken in 20 min!
  • A recirculating range hood from Vent-a-hood
  • An eMonitor energy monitor that tracks the electricity usage of every circuit in the home

It’s not just a bunch of cool gizmos

Overall, I want to point out that the home is not just a bunch of really cool technological gizmos. It’s a fundamentally new approach to assembling a building. Beginning with the concept of using solar heat, most of the other features derive from this simple first step: a lot of insulation and a tight building envelope to hold in the heat, an HRV to bring in fresh air without losing heat, and a concrete slab to store the heat for later. The second important aspect is the elimination of fossil fuel combustion in favor of electricity. It just so happens that things that use electricity are way more efficient than things that burn fossil fuels. We benefit from this increased efficiency when we install the PV system, which will be much smaller than it would have been without all the super efficient components listed above. In a nutshell, it’s a smarter, more holistic approach. That’s how we expect to achieve a home that uses 8 times less energy than the typical Massachusetts home.